With a century of seafood expertise flowing through our family’s veins along the Alabama Gulf Coast, we know a thing or two about turning fresh catch into culinary perfection.
So, how to fry oysters? It’s a question we hear often, and the answer is simpler than you might think.
Start by heating your frying oil to a sizzling 350°F, then coat those plump oysters in a cornmeal-based fry mix, and let them sizzle for just 2-4 minutes until they glisten with golden perfection.
Join us as we dive into the finer details of achieving that crispy, mouthwatering goodness.

Essentials for Oyster Frying Success: Ingredients and Equipment
When it comes to achieving fried oysters that are crispy and delicious, having the right ingredients and equipment at your disposal is key. Here’s what you’ll need to get started:
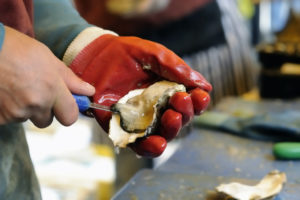
1. Fresh Shucked Oysters (Unwashed): The star of the show, fresh shucked oysters, should be your top priority. Opt for unwashed oysters, meaning they are shucked and placed in the packing container without washing. This preserves their incredible flavor, making them the perfect foundation for your fried oyster masterpiece.
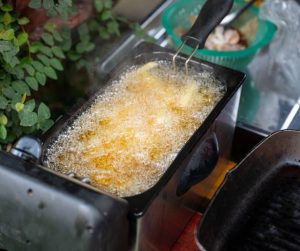
2. Deep Fryer or Cast Iron Frying Pan: For the best results, we recommend using a tabletop deep fryer like a Fry Daddy, which maintains a consistent temperature and minimizes splatter. Alternatively, if you prefer using a frying pan, opt for a sturdy cast iron skillet. Ensure the oil doesn’t exceed 375°F by using a frying thermometer.
3. Frying Oil: While beef tallow is our preferred choice for frying oysters, any high-quality oil suitable for deep frying will work just fine. It’s essential to use a clean and fresh batch of oil for each frying session to maintain optimal flavor.
4. Batter Mix: Elevate your fried oysters with our special batter mix. Combine one cup of cornmeal with four tablespoons of Cavender’s All Purpose Greek Seasoning for a flavorful and crispy coating that’s sure to impress.
5. Metal Spider Strainer Skimmer Ladle or Spoon: Deep frying can be a breeze with the right tools. A metal spider strainer, skimmer ladle, or a slotted spoon is essential for safely lowering the oysters into the hot oil and retrieving them once they reach that perfect golden hue.
6. Better Breader Batter Bowl: Make the battering process a snap with the Cook’s Choice XL Original Better Breader Batter Bowl. This all-in-one mess-free breading station tray simplifies the task, allowing you to pour in seasoning, add your oysters, and just shake for even, well-coated results.
With these ingredients and equipment in your arsenal, you’ll be well-prepared to embark on your journey to frying oysters to crispy perfection.
Now that you have what you need to fry oysters let look at the steps to frying the perfect oyster.

From Raw to Crispy Bliss: Step-by-Step Oyster Frying Guide
Frying oysters to crispy perfection may seem like a culinary challenge, but fear not! We’re here to guide you through each step, ensuring that your fried oysters turn out beautifully. Let’s dive into the process:
Step 1: Prep Your Oysters
- Begin with fresh, shucked oysters, preferably unwashed to retain their incredible flavor.
- Drain any excess liquid from the oysters and pat them dry with a paper towel. This helps the batter adhere better.
Step 2: Heat Your Frying Oil
- Pour your chosen frying oil into the deep fryer or cast iron frying pan.
- Heat the oil to a steady 350°F, using a frying thermometer to maintain the correct temperature. This ensures your oysters cook evenly and achieve that desirable crispy texture.
Step 3: Create Your Flavorful Batter
- In a bowl, mix one cup of cornmeal with four tablespoons of Cavender’s All Purpose Greek Seasoning. This combination adds a burst of flavor to your fried oysters.
- Dip each oyster into the batter, ensuring an even coating.
Step 4: Fry the Oysters
- Carefully place the battered oysters into the hot oil, making sure not to overcrowd the frying pan or deep fryer. Overcrowding can lower the oil temperature and affect the crispiness of the oysters.
- Fry the oysters for approximately 2-4 minutes or until they turn a glorious golden brown. Keep a close eye on them to prevent overcooking.

Step 5: Remove and Drain
- Once the oysters reach the desired crispiness and color, use a metal spider strainer, skimmer ladle, or slotted spoon to gently remove them from the hot oil.
- Place the fried oysters on a plate lined with paper towels to drain any excess oil.
Step 6: Serve and Enjoy
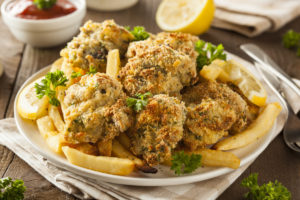
- Your crispy fried oysters are now ready to delight your taste buds. Serve them hot and fresh, perhaps with a squeeze of lemon or your favorite dipping sauce.
With these simple steps, you can master the art of frying oysters and create a delicious seafood dish that’s bound to impress.

Discover the secrets of oyster culinary perfection and join us in uncovering ‘Unveiling Oysters: Gems of the Ocean.‘ Dive in now!
Cornmeal vs. Flour: Choosing the Perfect Fry Mix
When it comes to frying oysters, one of the first decisions you’ll encounter is the choice between a cornmeal-based batter and a flour-based batter. Here’s a quick insight into this regional culinary preference:
Cornmeal-Based Batter (Southern Style):
- Down here in the South, we have a deep-rooted love for cornmeal-based batter. It imparts a unique, slightly gritty texture that pairs perfectly with the briny goodness of oysters.
- The cornmeal batter adds a distinct crunch and a touch of sweetness, enhancing the overall flavor profile of the fried oysters.
- It’s a popular choice in Southern coastal regions, where the sweetness of cornmeal complements the natural brininess of the seafood.
Flour-Based Batter (Northern and Western Preference):
- On the upper East Coast and the West Coast, a flour-based batter takes the spotlight. This batter tends to be smoother and less gritty compared to cornmeal.
- Flour-based batter provides a lighter, fluffier coating, allowing the delicate flavor of the oysters to shine through.
- It’s favored in regions where the emphasis is on showcasing the natural taste of the oyster rather than adding an extra layer of texture.
Ultimately, the choice between cornmeal and flour-based batter boils down to personal preference. Some prefer the hearty crunch of cornmeal, while others opt for the lighter, more delicate touch of flour.
Whichever you choose, both offer a delightful canvas for your fried oysters. So, whether you’re embracing the Southern tradition or exploring the coastal influences, rest assured that your fried oysters will be a treat for the taste buds.

Savoring Success: Your Path to Fried Oyster Mastery
As we wrap up our culinary journey into the art of frying oysters, you’re now equipped with the knowledge and techniques to master this seafood delicacy.
Whether you’ve chosen a cornmeal-based batter for that unmistakable Southern flair or a flour-based batter to let the oysters’ natural flavors shine, the key to success lies in your hands.
Remember, frying oysters isn’t just about creating a crispy outer layer; it’s about preserving the ocean’s essence within each bite.
Freshly shucked oysters, unwashed to retain their exceptional flavor, serve as the canvas for your culinary artistry.
The right equipment, the perfect oil temperature, and a flavorful batter all play their part in elevating this classic dish to new heights.

We hope this guide has inspired you to embark on your own journey of fried oyster mastery. The delight of savoring those golden, briny morsels, whether as an appetizer, a main course, or even as a snack, is an experience like no other.
So, gather your ingredients, heat that oil, and let your kitchen become a stage for the creation of crispy, delectable perfection.
Thank you for joining us in celebrating the flavors of the sea and the rich tradition of oyster frying.
As you enjoy your own creations or savor them at a coastal eatery, may every bite be a reminder of the culinary journey we’ve embarked upon together.
Until next time, happy frying, and may your plates always be adorned with the finest gems of the ocean.
